- 如何零基础免费搭建个人网站 之 密钥设置、设置 Personal Token、添加 workflow 以及 上传到 GitHub;
如果你不介意看英文,可以参考:
Official documentation of GitHub Pages action
Hugo官网上的那篇教程
有个问题是,你需要两个 Github 仓库,一个是 YOUR-PROJECT> (e.g. blog),另一个是 <USERNAME>.github.io 。其中第一个是 Hugo 文件夹的所有内容,第二个是第一个的子仓库,只包括其中的 public 文件夹。
这种设置的问题在于,你的博客更新的可能不仅仅是内容,掌管着网页格式的 layout 文件以及 css 文件也可能会更新。如果你需要让别人看到你的网页格式源代码,即,你的 layout 文件以及 css 文件,那么你每次更新的时候,不仅需要更新 <USERNAME>.github.io ,还需要更新 YOUR-PROJECT> (e.g. blog)。这一点,那篇教程
也提到了:
You can then run ./deploy.sh “Your optional commit message” to send changes to
.github.io. Note that you likely will want to commit changes to your repository as well.
我在 Amber Thomas
的 这篇帖子
找到了解决办法:在 <USERNAME>.github.io 仓库中建两个分支 (brance): sources 和 master。其中 sources 放 Hugo 文件夹所有内容,master 只放 public 文件夹内容。
Amber 帖子中提到的方法是由 Jente Hidskes 首次提出来的,Jente 之后对他原本的方法作出了更新 。以下的教程参考全程参考这三篇帖子,也参考 Hugo 那篇教程。
⚠ 以下内容以苹果电脑为例子,使用 Windows 的朋友可以作为参考,但我不保证结果正确。
新建 <USERNAME>.github.io 仓库并将本地仓库上传 #
首先,我假设你已经用了一个本地 Hugo 文件夹,网站建设已经基本完成,运行 hugo server -D,打开 http://localhost:1313
后网页显示一切正常。如果这些还没弄好,请先把网站在本地建设好之后再考虑部署到网上。
注意⚠:
- 在进行下面的步骤之前,你最好先把 hugo 文件夹中的
public和resources这两个文件夹删除。如果你里面有 README.md 的话,请先拿出来。 - 从现在开始,不要手动往 hugo 本地文件夹里添加任何东西,不然以下的代码会出错。
打开 Github, 新建一个仓库。仓库名称为 你的 Github 用户名.github.io。比如,我的 Github 用户名为 hhao1992, 我需要在 Repository name 这里输入:hhao1992.github.io。Description 这里写入自己以及别人可以理解的描述即可。然后选择 Public。随后的 Initialize this repository with a README ,暂时不要选。全部设置好之后,点击 Create repository 。设置如下图:
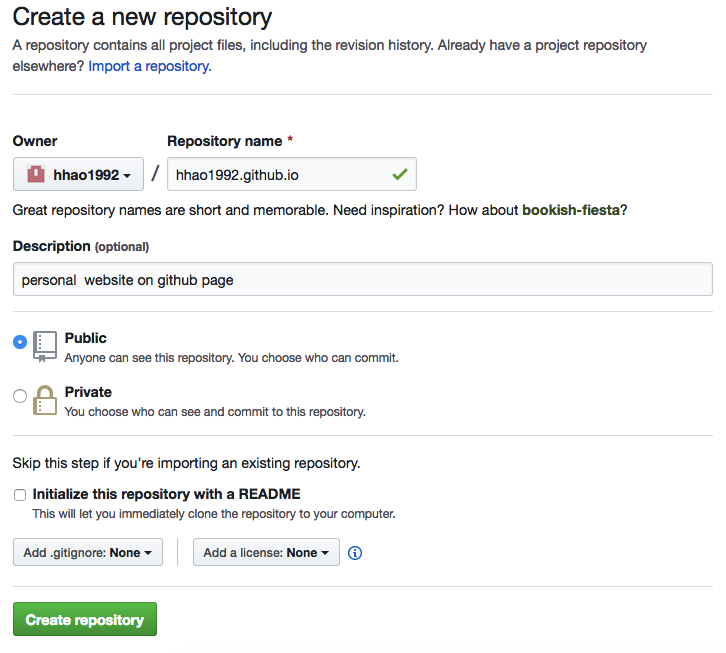
新建仓库设置
然后,你需要点击如下页面中右侧的那个按钮,复制这个仓库的地址

复制仓库地址
然后,我们需要将本地的 Hugo 文件夹上传到 Github,这样,本地文件夹和 Github 上的远程文件夹便建立了连接。随后我们只需要在本地文件夹进行修改,然后把变动上传到 Github 这个远程文件夹,网站内容也会随之更新。
如何将本地文件夹上传到 Github 呢?首先,你需要在Terminal 中 cd 到你的 Hugo 本地文件夹,比如我的:cd Desktop/hugo,然后我们用到如下代码:
echo "# hhao1992.github.io" >> README.md
# 请注意,hhao1992.github.io 中,hhao1992请换成自己的 Github 用户名
git init
git add README.md
git add .
git commit -m "first commit"
git remote add origin https://github.com/hhao1992/hhao1992.github.io.git # 同样,请换成自己的仓库地址
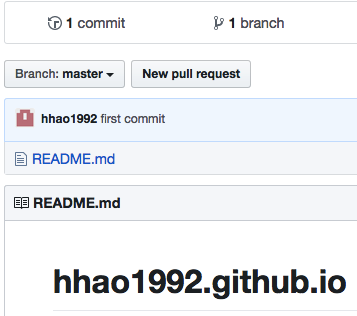
git push -u origin master其实这也就是刚刚创建的这个仓库底下 Github 提供的代码:

本地仓库上传到 Github
建立 sources 分支 #
第二步,我们需要回到 Github, 建立一个 sources1 分支。
回到我们刚才创建的仓库,刷新一下页面。你会看到在 1 commit 底下有一个关于 Branch 的选择,如下图:
仓库分支
点击 Branch: master ,然后在出现的文本框中输入 sources,或者别的你自己喜欢的名字,并点击随后出现的 “Create branch:sources from ‘master’"。
现在,在 1 commit 右边,应该是显示 “2 branches”,点击这个 “2 branches”。在 “Default branch” 这里,点击 “Change defualt branch”。在随后出现的页面中,点击 master 那里的下拉框,然后选择 sources,然后点击右边的 Update。如果你顺着这篇教程走,刚才没有在 master 分支新加入任何文件的话,点击 “I understand, update the default branch”。
然后,输入:
git fetch
git checkout sources
输入完之后,记得点一下回车键,这样最后一行才会被执行,以下的代码也一样。
将 public 文件夹放到 master 分支 #
紧接着,在 Terminal 中输入以下代码。输入完之后,先稍等一会儿,让程序运行一下,停止之后,再点击一下回车键,以运行最后一行代码:
# 注意⚠:此部分的代码块只可运行一次!
#!/usr/bin/env bash
# This script does the required work to set up your personal GitHub Pages
# repository for deployment using Hugo. Run this script only once -- when the
# setup has been done, run the `deploy.sh` script to deploy changes and update
# your website. See
# https://hjdskes.github.io/blog/deploying-hugo-on-personal-github-pages/index.html
# for more information.
USERNAME=hhao1992 # ⚠:请换成自己的 Github 用户名
SOURCE=sources # ⚠:如果你在上面的一步用的 不是 ‘sources’ 这个名字,记得换成你自己的,其他的不用变
msg() {
    printf "\033[1;32m :: %s\n\033[0m" "$1"
}
msg "Adding a README.md file to \'$SOURCE\' branch"
touch README.md
msg "Deleting the \`master\` branch"
git branch -D master
git push origin --delete master
msg "Creating an empty, orphaned \`master\` branch"
git checkout --orphan master
git rm --cached $(git ls-files)
msg "Grabbing one file from the \`$SOURCE\` branch so that a commit can be made"
git checkout "$SOURCE" README.md
git commit -m "Initial commit on master branch"
git push origin master
msg "Returning to the \`$SOURCE\` branch"
git checkout -f "$SOURCE"
msg "Removing the \`public\` folder to make room for the \`master\` subtree"
rm -rf public
git add -u
git commit -m "Remove stale public folder"
msg "Adding the new \`master\` branch as a subtree"
git subtree add --prefix=public \
    https://github.com/$USERNAME/$USERNAME.github.io.git master --squash
msg "Pulling down the just committed file to help avoid merge conflicts"
git subtree pull --prefix=public \
    https://github.com/$USERNAME/$USERNAME.github.io.git master
如果 Terminal 中出现 fatal: refusing to merge unrelated histories 这样的错误,请接着在 Terminal 中输入:
git subtree pull --prefix=public \
    https://github.com/$USERNAME/$USERNAME.github.io.git master --squash
这个方法是在 Hisoka Blog 看到的。感谢原作者。
随后,在 Terminal 中输入
git status我输入完之后 Terminal 出现如下内容:
(base) 149-160-181-57:hugo Tal$ git status
On branch sources
Your branch is up to date with 'origin/sources'.

Changes not staged for commit:
  (use "git add/rm ..." to update what will be committed)
  (use "git restore ..." to discard changes in working directory)
	deleted:    public/404.html
	. # 为了节省空间,中间的内容有删除
	deleted:    public/tags/贝叶斯/index.xml

Untracked files:
  (use "git add ..." to include in what will be committed)
	.gitignore

no changes added to commit (use "git add" and/or "git commit -a")
(base) 149-160-181-57:hugo Tal$
当然,每个人出现的内容可能不一样,如果你按照上面建议的,在开始之前已经把 public 和 resources 这两个文件夹删除了,那也许只会出现 Untract files: 这一行。
接下来,我们需要使用 git add 这个代码将上面显示的文件加入 Github 远程仓库。例如,我在 Terminal 中输入了如下代码2:
git add .gitignore
git commit -m "adding file(s)."
git push
注意,如果你在上面的 Terminal 结果中的 Untract files: 这一块,除了有 .gitignore 之外还有别的,那么你在代码中 git add .gitignore 这一行下面,也用 git add 来上传这个或这些文件。
比如,在 Termial 结果中,Untract files: 这一行, .gitignore 之下还有,layouts/,那么,你就需要在git add .gitignore 这一行下面,git commit -m "adding files." 这一行上面,输入 git add layouts/。
如果一切正常,并没有显示说有什么 Untract files:,只是显示
Your branch is ahead of 'origin/sources' by 2 commits.
  (use "git push" to publish your local commits)
那么你只需要输入你下代码:
git add .
git commit -m "adding files"
git push
随后,我们需要在 Terminal 中输入以下代码:
#!/usr/bin/env bash
# This script allows you to easily and quickly generate and deploy your website
# using Hugo to your personal GitHub Pages repository. This script requires a
# certain configuration, run the `setup.sh` script to configure this. See
# https://hjdskes.github.io/blog/deploying-hugo-on-personal-github-pages/index.html
# for more information.
# Set the English locale for the `date` command.
export LC_TIME=en_US.UTF-8
USERNAME=hhao1992 # 请换成自己的 Github 用户名
SOURCE=sources # 如果你不是用的 sources 这个名字,请改成你用的
# The commit message.
MESSAGE="Rebuilding site $(date)"
msg() {
    printf "\033[1;32m :: %s\n\033[0m" "$1"
}
msg "Pulling down the \`master\` branch into \`public\` to help avoid merge conflicts"
git subtree pull --prefix=public \
    https://github.com/$USERNAME/$USERNAME.github.io.git master -m "Merge origin master"
msg "Building the website"
rm -rf public
hugo
msg "Pushing the updated \`public\` folder to the \`$SOURCE\` branch"
git add .
git commit -m "$MESSAGE"
git push origin "$SOURCE"
msg "Pushing the updated \`public\` folder to the \`master\` branch"
git subtree push --prefix=public \
    https://github.com/$USERNAME/$USERNAME.github.io.git master
不出意外的话,回到我们刚才建的 Github 仓库,点击仓库下面那一行最右边的 Settings, 在出现的页面的底部,可以看到如下内容:
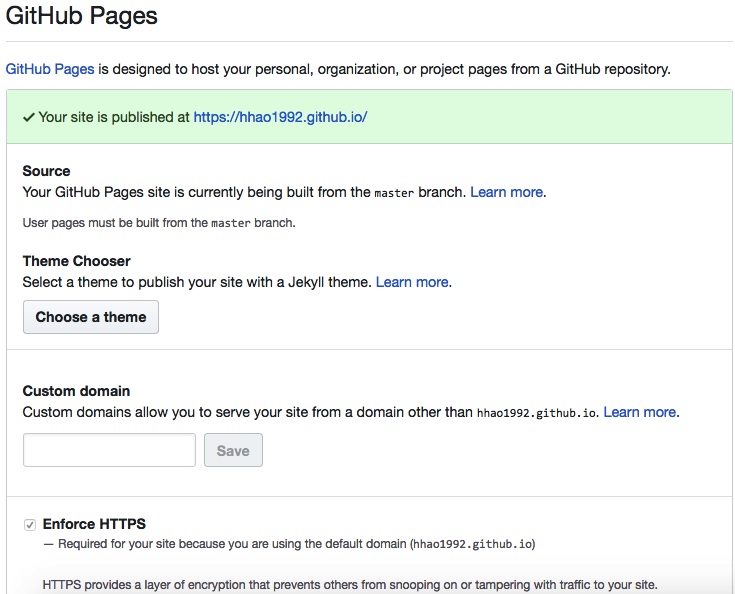
部署成功
点开链接,就能看到自己的网站了。
日常更新 #
打开一个文本编辑器,比如 Typora ,Sublime Text 等。新建一个名为 deploy.sh 的文档,把上面刚刚运行的复制进去。
每次更新的时候,只需要在 Terminal 中输入以下代码即可:
bash deploy.sh自定义域名 #
这部分其实很容易。我的域名是在 Namecheap 买的。其他地方在设置上应该差不多。这里我就以 Namecheap 举例。
其实,Namecheap 自己已经给出了 解决方法 。
按照上面的方法,你在买完域名后,到 Manage 页面里的 Advanced DNS。首先把网站自动加的那两个 Record 删除,在 Namecheap, 网站自动加了 CNAME Record 和 URL Redirect Record, 把这两个先删除。随后,点击 “Add New Record”,新加四个 A Record, 这四个 Record 的 Host 填 @ , value 分别填下面四个:
- 185.199.108.153
- 185.199.109.153
- 185.199.110.153
- 185.199.111.153
其中,185.199.108.153 这个 A Record 的 TTL 选 30 min,其他填 Automatic
然后,加一个 CNAME Record, Host 填 www , value 填 <username>.github.io,比如我的填 hhao1992.github.io, 随后 TTL 选 30 min。设置如下:
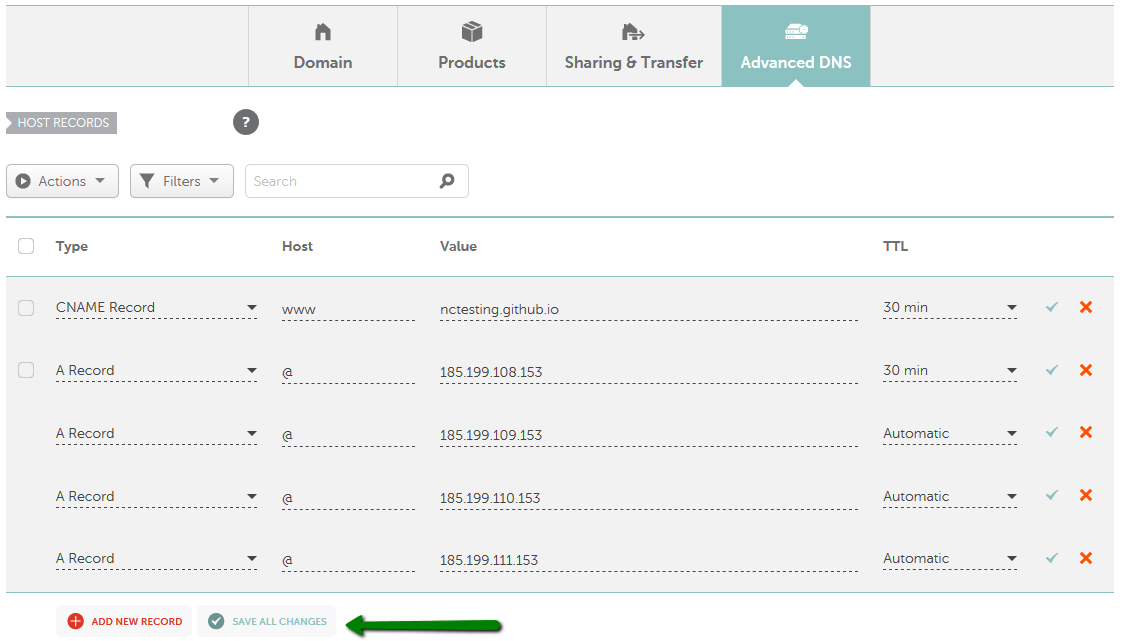
图片来源:Namecheap
这些设置好之后,我们需要让 Github 知道我们想把 https://<username>.github.io 这个网址转到 我们自己买的域名。怎么告诉呢?
Github 的 官方指南
给出了方法。到 <username>/<username>.github.io 这个仓库,找到 Settings, 然后在 GitHub Pages 中的 Custom domain 这里填入我们自己的域名即可。

图片来源:GitHub
这个是可以的。但这会带来一个问题。
当我们在 custom domain 输入我们的自定义域名后,master 这个 branch 会自动加一个 CNAME 文件。由于 master branch 其实就是我们本地 Hugo 文件夹里的 public 文件夹,而 Hugo 每次自动生成 public 文件夹并不会自动加 CNAME 文件,这就造成了本地仓库和远程仓库的不一致,会导致我们无法将本地仓库上传,因此 Hugo 网站也就无法更新。解决的办法很简单,只需要在我们之前提到的 deploy.sh 文件中加三行代码即可。这三行代码要加在 hugo 之后,msg "Pushing the updated ... 之前。加哪三行代码呢?
cd public # cd 到 public 文件夹
echo "hongtaoh.com" > CNAME # ⚠! 请换成自己的网址!
cd .. # 返回上一级
怕大家弄错,我把完整的 deploy.sh 文件放在下面。但是请记得,如果你没有用自定义域名的打算,请用上面最原始的那个 deploy.sh,而不是下面这个。
export LC_TIME=en_US.UTF-8
USERNAME=hhao1992 # 请换成自己的 Github 用户名
SOURCE=sources # 如果你不是用的 sources 这个名字,请改成你用的
# The commit message.
MESSAGE="Rebuilding site $(date)"
msg() {
    printf "\033[1;32m :: %s\n\033[0m" "$1"
}
msg "Pulling down the \`master\` branch into \`public\` to help avoid merge conflicts"
git subtree pull --prefix=public \
    https://github.com/$USERNAME/$USERNAME.github.io.git master -m "Merge origin master"
msg "Building the website"
rm -rf public
hugo
cd public
echo "hongtaoh.com" > CNAME
cd ..
msg "Pushing the updated \`public\` folder to the \`$SOURCE\` branch"
git add .
git commit -m "$MESSAGE"
git push origin "$SOURCE"
msg "Pushing the updated \`public\` folder to the \`master\` branch"
git subtree push --prefix=public \
    https://github.com/$USERNAME/$USERNAME.github.io.git master
注意事项 #
- 如果你往根目录,也就是和
content平行的这个目录新加文件,比如自定义域名时需要的CNAME, 在运行bash deploy.sh命令之前,一定要先把这个新加的文件上传。
以新加入 CNAME 为例,运行如下代码
git add CNAME
git commit -m "adding CNAME"
git push最后一次修改于 2025-07-02 • 编辑本页